Some of the links below are affiliate links, which means we will earn a commission on the products or services you purchase using the links. There is no additional cost to you and the earnings help keep this website running. Read the Affiliate Disclaimer for more information.
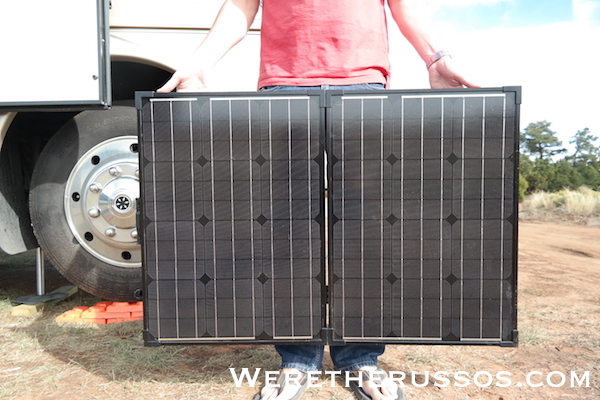
In this Renogy 100w portable solar panel review, I will share why we purchased this portable panel for our RV and our experiences with it so far.
One of the most considered upgrades for RVers is solar. Before we started full time RVing in our small Class A motorhome, we lived out of it for two months. Four of those weeks were spent dry camping without hookups to better understand our energy consumption. After the four week, we decided on two main upgrades:
- 1) solar to recharge the RV house batteries
- 2) upgraded house batteries to capture solar energy.
The main reason we wanted solar for the RV was to off-set generator usage.
Roof mounted solar system vs portable solar panels. With a roof mounted system, the cost was around $5,000 with installation. With a portable solar setup, the cost was between $280-$800 without the additional cost of installation. Unsure if a roof mounted system would be suitable for us, we decided to purchase a portable solar panel. There are several manufactures of portable solar units on the market. With cost being a major factor in our decision making, we opted for the Renogy portable suitcase. This is our initial Renogy 100w portable solar panel review, check the update section at the end of this post.
Renogy 100w Portable Solar Panel Review
Before I dive into the review, here is the video review of our Renogy 100w portable panel if you want to check it out before reading through the post.
What We Ordered
We purchased the Renogy 100 Watt 12 Volt Portable Panel with charge controller.
What We Like
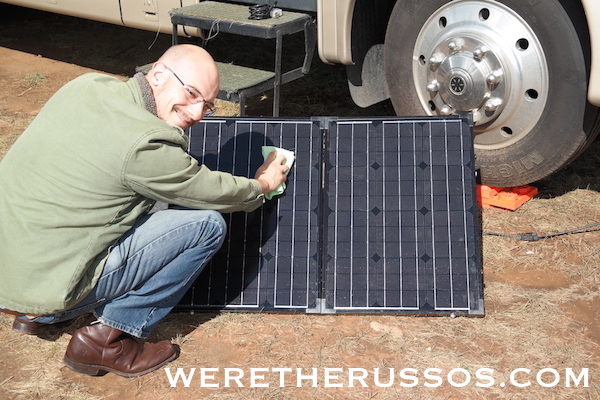
Solar panels work well. The portable unit consists of two 50w panels that provide 5.4 amps/hour or more in full sun. On a cloudy day we get between 1 to 3 amps/hour. This is typically enough to maintain the systems in our motorhome and provide a trickle charge for the two 6v house batteries. We still need to run the generator on days we don’t get enough solar power.
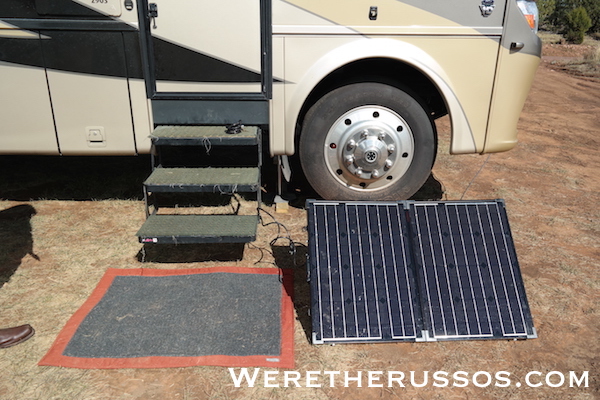
Inexpensive compared to other portable solar panels. The Renogy unit was about half of what a 120w portable unit sold for by other manufacturers. We have the option to buy two 100w portable units for the same price as a 120w unit. Two panels would allow us to hook one unit up to each house battery for more solar power.
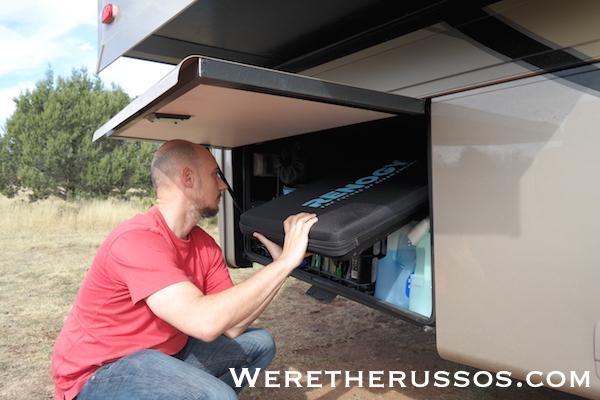
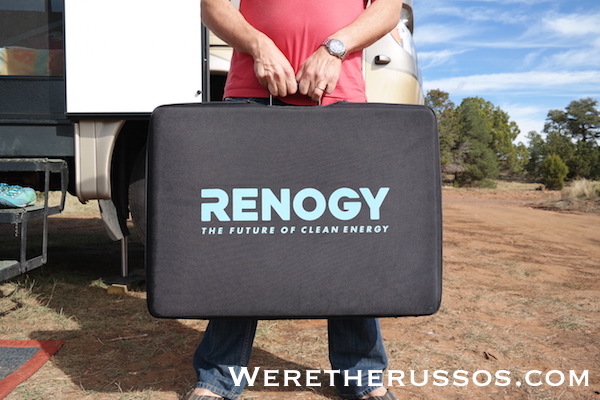
Small enough to store in RV. The portable unit folds in half, small enough to store in the rear bay. It’s also compact enough that we can leave it inside the RV.
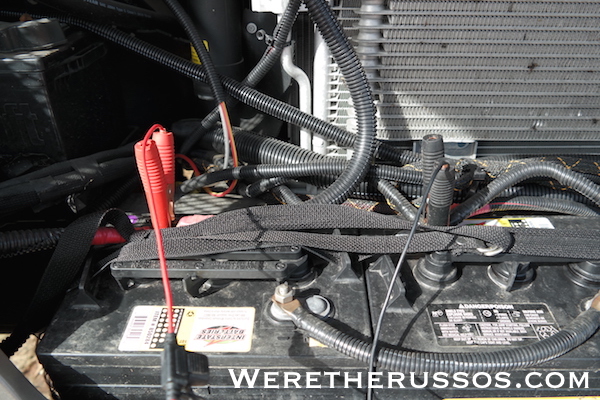
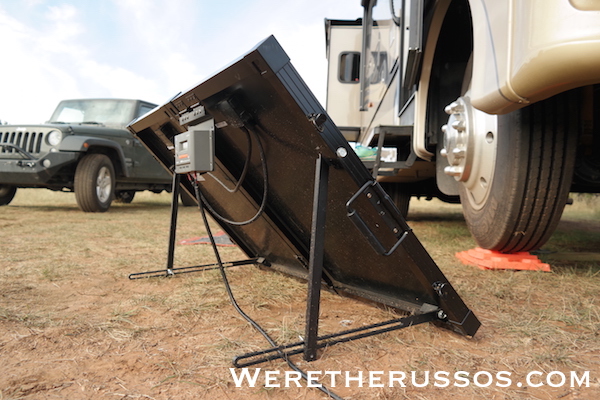
Set up is fairly easy. To connect the unit, take it out of the carrying case, unfold it, extend the legs and attach the alligator clips to the battery terminals. Only one person required for setup and breakdown. There is no installation or additional costs associated with using the solar panels.
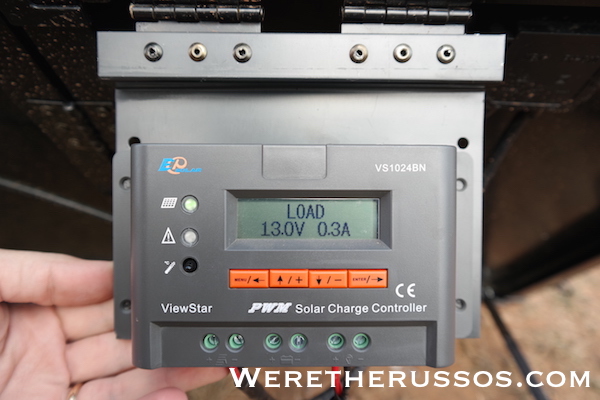
Charge controller is accessible and easy to read. The 10 amp charge controller is mounted to the back of one of the panels on a hinge and secured with a strip of velcro. It’s simple to check the controller and the LCD panel is easy to read. The controller provides a general diagnostic such as the level of charge coming in, the state of charge for the battery.
Portable. If we sell the RV, we can take the unit with us – it’s not tied to the RV the way a roof mounted system would be.
What We Don’t Like
Quality control. Our first unit had to be returned because a screw holding one of the legs had stripped the threads in the mounting bracket. The panel was scratched in various places and looked as if it had been previously used or snuck past quality assurance. We were able to exchange the unit for another one without any issues through Amazon. The second unit arrived in good condition, but there were similar scratches around the panels.
Flimsy. All the screws holding the legs together were loose and had to be tightened. The screws were steel and the mounts they were screwed into were aluminum. This meant the screws could not be tightened down much or they would strip out the threads. The frame and legs of the unit appeared to be flimsy, but have held up well.
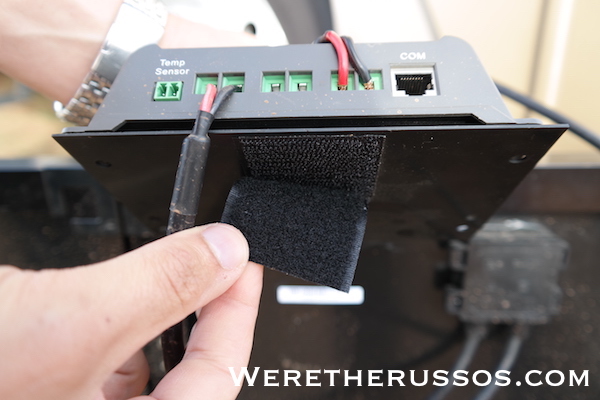
Cheap parts. The velcro that holds the charge controller to the panel fell off the first day it was in the sun. The heat of the sun melted the adhesive backing. It seems like corners were cut to reduce the price of the unit, but considering the panel is made to be in the sun, the velcro should hold.
No instructions. Renogy sent the unit out without any instructions. We had to find them online and download it. The setup instructions were easy to understand and we connected the unit without any problems.
Charge controller is not waterproof. The panels are 100% waterproof, but the charge controller is not. This means if there is any chance of rain and we want to leave the RV, we can’t leave the panel out without risk damaging the controller. We also can’t leave the unit out overnight to catch the morning sun if there is a chance of rain.
Cable length. The cables for the unit are 10’ long. Depending on which way the shadows are cast, we can’t always move the panel into the sun. We try our best to park in the optimal direction for solar power, but that’s not always possible depending on where we are.
Overall
Although we have several complaints about the Renogy 100w portable solar suitcase, it does work well. This suitcase is good for those looking to supplement energy usage in a small RV and don’t want to pay the higher cost of other units.
Update
Since writing the review, we’ve been able to camp at a few places where we got sun all day. One of those places was the free camping spot in Tucson, Arizona. To our surprise, the Renogy solar suitcase was able to fully charge the batteries each day with the fans running and turning the inverter on to watch the Packers play. We were very happy with the performance of the panel.
As of January 2017, the 100 watt portable solar suitcase we purchased is no longer available. Renogy has a new 100 watt Monocrystalline Solar Suitcase.
If you found this review helpful and plan to purchase the Renogy portable solar unit, please consider ordering through our Amazon affiliate link. There is no additional fee for the buyer and in return we receive a small percentage of the sale. Thanks for your support! We really appreciate it.
Disclosure: We paid for the product in this review and this review represents our own opinions.

Nice article – just wanted to share my experience with Renogy:
I ordered a kit from Renogy and 3 weeks later, I am still waiting for it to be correct. I have spent hours on the phone with customer support. Waited days and days on empty promises.
I would go with ANY other solar solution available before I would go with Renogy again. Complete garbage and terrible customer service.
The new Renogy 100w portable suitcase kit keeps the controller safely stored in the RV to prevent getting wet or dirty. It is on backorder though
Hi guys. Marie and Chris here. The ones that bought your Baystar. What do you suggest for a satellite dish?
Hey Marie and Chris! How’s it going? Wish we could offer some suggestions, but we never looked into getting a satellite dish for the RV. The digital TV antenna worked well for us.
Thanks for the blog! I am sitting right across the street from you, in site 68, drinking a glass of wine and reading your very interesting articles.
Full-time life has just been the best thing we have ever done. Enjoy!
Hi Kathryn! So glad you left us a comment. How long will you be at the campground? We’d like to stop by and say hello if you’re still around tomorrow.
Thanks for this review. Based on the review, today we purchased a 100w portable kit like yours through your Amazon link (since you did point us in this direction!). I thought we’d experiment during our upcoming trip (Dallas to GC to Vegas and back) as we plan to boondock some as well as camp at parks. I do have a question. Have you found (or found a need) an extension cable for this kit? Seems that more than 10′ of cable could come in handy in certain situations. Again, we appreciate the tips!
So we know you can get an extension but haven’t done so. I wanted to put in a quick connect so we wouldn’t have to pop the hood every time we want to connect – but haven’t gotten to that either. Only warning about the extension is that as you go longer, you’ll experience some losses between the panel and batteries. Thank you for making the purchase through our link, we appreciate it. Let us know how the panel works out for you.
Appreciate the additional information. I like the panel but have not yet figured something out (Newbie pains!). Our rig has four six volt batteries wired in series. I think I need to reprogram the controller to charge six volt batteries before the panel will work and unfortunately I was in the middle of nowhere Utah/Nevada/Arizona (?) so I had no internet connection to download the additional manual. I checked the panel on our chassis batteries which are 12 volt and it worked great. Once I get this figured out I’m sure I’ll be pleased.
Although you have 6v batteries, the output is 12v so you don’t want to change anything on the charge controller. My guess is that you’re not hooking the panel to the correct battery terminals. You should attach the negative at one end of the bank and the positive at the other – these should be the same leads that are going into your coaches electrical system. The best way to check is to get a volt meter and check the leads to make sure you see 12v before plug it in. If you email us I can show you a pic of how we do it (we also have 6v batteries)
Ahhh. I see. Okay let me try that when I get a chance. Thank you very much!
nice! i had a similar system. i put the charge controller in a a NEMA enclosure
Ah good idea – never would have considered one of those.
I would mount the charge controller in the battery bay using the shorter wires that go to the panels. Then use the longer wires from the charge controller to the solar panels. You can then leave the panels out and the charge controller should be dry in the battery bay.
Great idea! I may need to cut some wires to make it work, and then maybe velcro the charge controller under the hood and pull it out when we pack up. Thanks for the genius idea!
Joe, If you do mount the charge controller in your battery bay and re-do the wiring, an update to this article with photos of the change would sure be helpful. Buying this unit, along with 2 new 6 volt chassis batteries are on our June list of things to throw money at. And, if anyone knows of a good heavy wire extension (there must be one available) to get the panels out further in the sun, that would also be very helpful. Thanks!
I just answered one of my own questions, here are the extension cables for sale by the manufacturer: http://www.renogy-store.com/Extension-Cable-s/1902.htm
Is there a way to protect the charge controller in the rain? Can it be disconnected and placed in some kind of clear “box” that would be water proof?
We’ve tried wrapping the charge controller in plastic but it didn’t do much and we haven’d found a way to keep it dry. The charge controller is removable, however if it’s going to rain, it’s a lot less work to put the panels away rather than trying to disconnect the controller (you need to remove 4 wires and unscrew it from the panel).
Glad I caught your review. Been looking at solar panels to put on our bus and couldn’t decide. I will check into these.
Great, and let us know if you have any questions.